March 20, 2015
There are many ways to decorate apparel, yet one — if not the main — issue always is the customer’s budget.
Embroidery can get pretty expensive with digitizing and production, especially when you get into larger designs such as full-front and back placements. Production limitations also can be factors that increase costs. With a little thought and design knowledge, you can mimic the look of embroidery with traditional screen printing, while minimizing costs and production times.
In this article, I will show you some simple ways to achieve the faux embroidery look that you can add to your current and new designs to increase your profits and impress your customers. What’s more, you can do all of this with minimal overhead and production costs.
Client budget will play an important role in the method or route you take. But the possibilities are endless in the art and design for screen printing, as well as heat-applied products that cover all spectrums of the faux embroidery look.
Based in CorelDRAW X7 — yet fairly similar to the previous version of CorelDRAW — you will need to have a general understanding of outlines, the outline dialog, paths, artistic media, Spraylists and the various fill types offered in the graphics suite.
One of the basic and most widely used faux embroidery methods is stitching
effects. It entails using special default dashed outlines to simulate a stitched look. The method for this effect is the fastest and easiest one that can be modified for use with one-color and multicolored designs.
Step 1:
It starts with the initial document setup. With an open document, set your page and guidelines so you are working at actual print size. This helps ensure your stitch effect is at a good printing size and resembles a realistic stitch or thread. Your art detail, equipment and screen mesh also will come into play when determining how big you make your stitch. Keep this in mind for easier and accurate production when you are designing.
Step 2:
We will start from scratch and typeset the word “IMPRESSIONS,” mimicking an athletic letterman-style design, and fill it with a gold color. Choosing a color from a PMS color palette will ensure easy separations when the design is finished and ready for film output. (You can find a simple color separations webinar on Corel’s YouTube channel.)
Converting to curves (press Ctrl+O) may help on future steps/effects with certain fonts. And note that Welding (the “hot key” is “W” on the keyboard) will be needed for most script-style fonts. Finally, converting text to curves will turn text into an object and make it non-editable as text.
Step 3:
Using the Contour tool, select the IMPRESSIONS object (the text), add a decent-sized contour and fill it with a PMS red. Next, select both the “text” and contour, and break them apart by hitting the Ctrl+K keys simultaneously. This will result in two separate objects: the original text object and the contour “outline” object. Play with the contour size until you are happy with it. Every font style may warrant a different size contour to get the best look.
Step 4:
Select the object/text, IMPRESSIONS, and add a two-point outline. In the Outline Properties dialog, choose one of the default dashed outlines. Play with the various default options along with the outline size until you are happy with the look. Make the outline color a PMS black color. In the same Outline Properties dialog, choose “Inside” (this is a new feature released in Corel Graphics Suite X7) for the outline placement and the “Scale with Object” option.
Step 5:
Select the Contour, Red object, and apply the same dashed outline that you previously used. Fill the text, IMPRESSIONS, with the PMS black color. You can copy the outline properties using the Copy Properties Eyedropper tool.
With further knowledge of CorelDRAW, there are many other ways to achieve this look. Using pattern fills, one can mimic the look of an entirely different fabric stitched to the garment. This method can bring more colors into the design and print. It may raise costs, but it still should be considerably less expensive than true embroidery while retaining that great look.
CorelDRAW allows for all types of customizations to the workspace, as well as the ability to create your own custom outlines for a more realistic and truly custom stitch pattern. The Artist Media tool and sprayer allow users to create more unique and accurate-looking stitch patterns. This is where you can start getting really technical with your faux stitch patterns by mimicking the various patterns used in industries where stitching is used.
With the many ways to achieve the same or similar results, the options are endless. Using blends, sprayers, brushes and outlines, you can mimic embroidery quite easily and fairly quickly — provided that you have knowledge of the software.
I only mentioned a few of the methods for achieving the faux embroidery look in CorelDRAW. Play with the various tools, fills and patterns to create your own unique and custom looks to set your shop apart from the competition.
Richard Reilly is a freelance graphic designer specializing in T-shirt designs, color separations and film output. He is an industry veteran, owning an automated screen-printing and embroidery shop in Jacksonville, Fla. A self-taught CorelDRAW user, he was named CorelDRAW Master by Corel Corp. in 2012, along with seven other artists worldwide. For more information or to comment on this article, email Richard at richard@fluiddsn.com or visit fluiddsn.com.
Suggested Reading
Like this article? Read these and other screen printing articles at impressionsmag.com:
• “CorelDRAW X7: An Update”
• “Screen Printing Artwork for Beginners: Part 1”
• “Screen Printing Artwork for Beginners: Part 2”
March 20, 2024 | Production
As with pretty much any business, one of the keys for apparel and T-shirt decorators running a successful custom screen-printing shop is having the right equipment, first and foremost, the right press, or presses.
FULL STORY
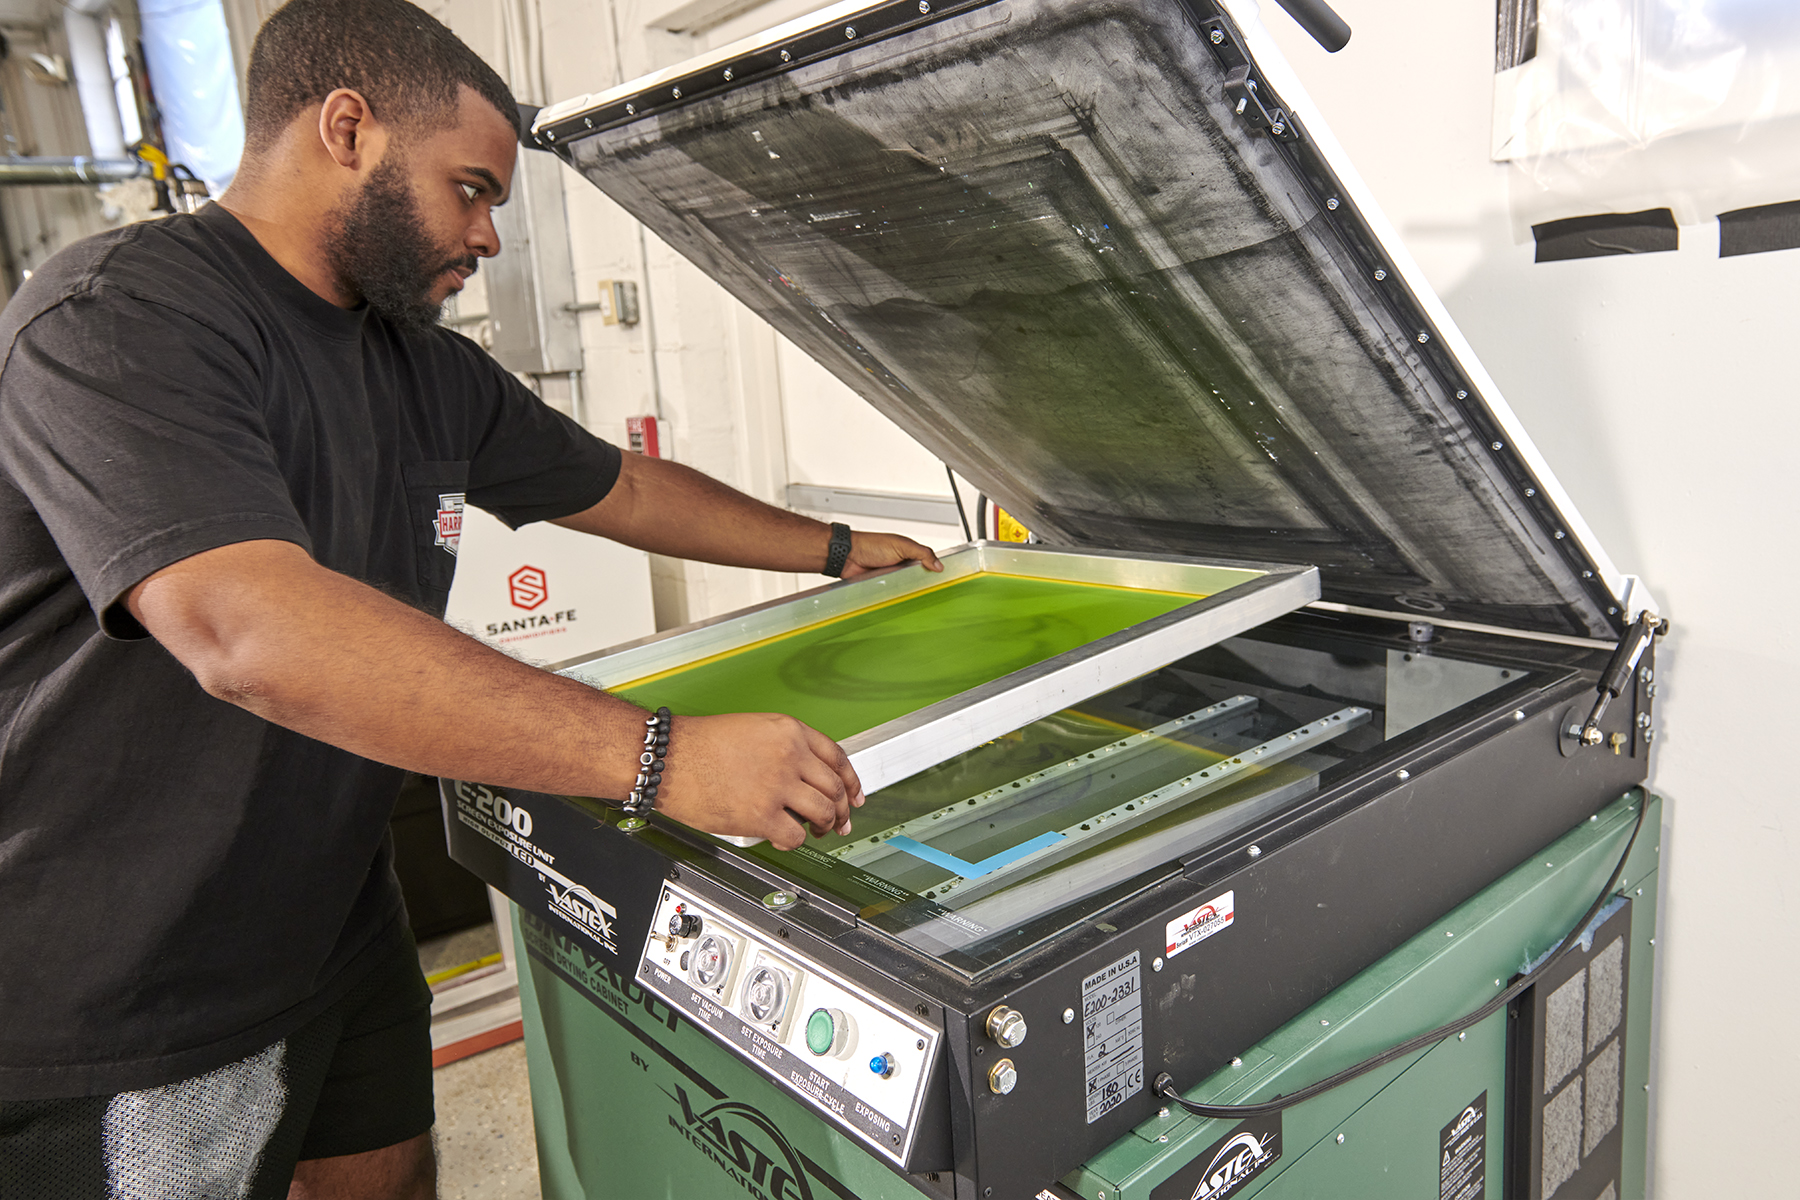
March 15, 2024 | Production
As is the case with flash units and dryers, screen exposure units, computer-to-screen-systems and washout booths are critical to successful screen printing of T-shirts and other apparel
FULL STORY
January 16, 2024 | Production
Go to any industry trade show or visit an actual custom apparel screen-printing shop, and your eyes will naturally be drawn to the press, or presses there. This is true whether the shop in question employs a single manual press or is running multiple autos.
FULL STORY