March 17, 2015
Owning a heat press has never been more exciting than it is today due to the wide variety of heat-applied graphics available. From traditional team graphics to the most extreme special effects, today’s heat transfer decorators have adopted the name “heat printing” to better describe this versatile process.
Advancements in the chemistry of inks, adhesives, transfer papers and heat presses have made a huge impact on the growth of the heat-transfer decoration business. Here is a snapshot of some of the most common heat-printing processes available for your business today.
Cold-Peel Transfers
These came on the scene in the early 1960’s and many thought heat transfers were just a passing fad. But six decades later, these plastisol transfers still are as popular as ever. Cold-peel plastisol transfers provide a semi-gloss look that is popular with team sportswear and for general garment decoration.
For large print runs, some shop owners stack the garments off to the side after heat pressing and peel the paper later to increase the heat press operators’ production speed. General application guidelines for cold peel transfers are 350˚F, medium pressure for 15 seconds and peel the paper after the garment is completely cool. For this and other transfer applications, always follow the manufacturer’s guidelines.
Here’s a cold-peel application tip: After pressing the transfer, open the heat press and rub the back of the transfer with a flannel cloth or chalk board eraser to help cool the ink quicker.
Hot-Split Transfers
Also made of plastisol, these were developed in the 1980’s just in time to revitalize the heat-transfer industry. This was because many cold-peel transfers at that time weren’t durable due to poor application practices and the substandard heat press equipment of the day.
Hot-split plastisols are made with an additive that allows half of the ink to stay on the paper and the other half to release to the garment when the paper is peeled. When the ink splits from the paper, it leaves behind a graphic on the garment with a matte finish and a soft hand feel.
General guidelines for applying hot-split transfers are 365˚F for 8 seconds, firm pressure and peel the paper immediately after heat printing.
For hot-split transfers, here’s a tip: After heat pressing the transfer, open the press and peel the paper immediately in one smooth, continuous motion. Delaying peel time can result in a defective print.
Hot-Peel Transfers
After heat pressing a hot-peel transfer (also made from plastisol ink), it’s important to peel the paper immediately and all of the ink will be transferred to the garment, leaving the paper clean. Some hot-peel transfers use special adhesives applied to the back of the transfer to help with the release and to increase the mechanical adhesion.
General guidelines for applying hot-peel transfers are 365˚F, firm pressure for 4 to 6 seconds and peel hot.
Transfers for Performancewear
Heat transfers made for the new moisture-wicking fabrics are commonly made with a special mix of plastisol that has elastomers added in the ink formulation to provide extra stretch qualities.
Most transfers that are made for performancewear are backed with a low melting adhesive that allows the graphic to be heat printed at 275˚F for 15 seconds and peeled cold. This lower melt temperature is ideal for decorating on heat-sensitive fabrics and the lower application temperature helps to reduce dye migration.
Glitter and Bling Transfers
The garment decoration market has exploded with the growing popularity of “bling” heat transfers that include glitter transfers that were so popular in the 1970’s. General application guidelines for plastisol glitter transfers are 350˚F for 15 seconds and peel cold.
CAD/CUT Glitter
This is another process for heat printing glitter for that retro look. Glitter CAD materials are available in a wide variety of fashion colors and can be purchased by the roll or by the yard. With this process, all that is needed is a computer, digital cutter, CAD/CUT glitter yardage and a heat press.
Rhinestone Transfers
These are included in the “bling” category and currently are the rage in the fashion apparel market. Custom rhinestone designs are available from several industry manufacturers or can be custom made by using bulk rhinestones and design templates. In addition to rhinestones, there also are nail heads, studs and rhinestuds available for that unique look. General application guidelines for rhinestones are 325˚F, firm pressure, and peel the carrier sheet cold.
Foil Transfers
Another favorite with garment decorators for that ultimate bling factor, stock foil transfers can be purchased from manufacturers or made in house. General application instructions are 330˚F with firm pressure and peel cold.
Flock Transfers
Considered a special effect transfer with a fuzzy feel and a 3-D look, flock transfers are manufactured by the screen-printing process using equipment made specifically for flock transfer printing. Flock can be heat applied to a variety of substrates from towels to woven materials and is ideal for decorating challenging fabrics like terry cloth and corduroy.
General guidelines for applying flock transfers are 350˚F, light pressure for 12 to 15 seconds and peel cold.
Cut-able CAD Flock
This is another great way for T-shirt shops to heat print with flock in-house. With this process, all that is needed is a computer with a digital cutter, CAD flock yardage and a heat press. CAD flock has an adhesive backer and is laminated to a carrier sheet that allows the flock yardage to be cut and weeded before heat printing onto the garment.
Sublimation Transfers
Sublimation has been around for decades but today’s inkjet printers have increased the popularity of sublimation transfers since decorators can now print them in house with a desktop printer instead of outsourcing the printing to an offset printer or screen printer. The vast majority of sublimation ink is water based and is ideal for printing with an Epson-based, piezo inkjet printer.
It’s important to know that sublimation inks only will work when transferred onto 100% polyester materials. In addition sublimation inks are translucent and should only be printed on white or pastel garments for best results.
Here is a sublimation application tip: Open the heat press gently after the pressing cycle to avoid the paper from moving on the garment’s surface. This shift of paper after transferring can cause a ghost image on the garment since the ink is still “gassing.” Pick off the paper fast after transferring.
General guidelines for applying sublimation transfers onto polyester garments are 390˚F-400˚F with medium pressure for 30 to 40 seconds.
CLC Transfers
The term CLC is an acronym for color laser copier and to produce a CLC transfer all that is needed is a computer, laser printer, coated CLC paper and a heat press. CLC papers are easy to use and work on a variety of fabrics from 100% cotton to poly blends. The main advantage for using CLC heat transfers is for quick turnaround jobs and short print runs.
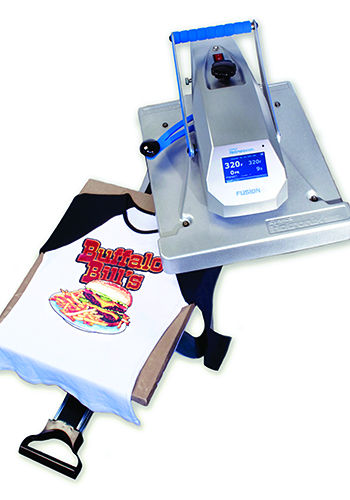
To be able to take advantage of all of the latest ink and chemistry advancements in the heat transfer industry, it is important to acquire a heat press that is accurate and up to date. Since the heat printing process is dependent on three variables — time, temperature and pressure — it’s important to purchase a “modern” machine that accurately controls all three.
James Ortolani has more than 30 years experience in the decorated apparel industry, specializing in hands-on direct screen printing and heat transfer production. He has worked for main industry suppliers, and currently serves as R&D project manager for Transfer Express. For more information or to comment on this article, email James at james.ortolani@stahlsdfc.com.
Pre-heating your garment by heat pressing it first before pressing your design removes the chemicals and moisture that may be in it due to manufacturing. Also, pre-heating assures a wrinkle-free surface for heat application.
Suggested Reading
Like this article? Read these and other digital printing articles at
impressionsmag.com:
• “Pressing for Profit”
• “Push the Design Envelope with Multimedia”
April 27, 2023 | Graphics + Design
When it comes to creating a design layout for a hat, hoodie or T-shirt, there are some basic concepts it’s important to keep in mind to create a design that’s pleasing to the eye, catches your attention and draws you in. One of these concepts is focal point.
FULL STORY
May 18, 2022 | Graphics + Design
According to Erik Cartmill, president of Cornerstone Impressions, Fort Worth, Texas, his business operates on the following philosophy: “Where there’s a Bill, there’s a way.”
FULL STORY
March 3, 2022 | Graphics + Design
“But I’m not an artist!” the screen printer said on the phone for the second time. He had agreed to do some work for his best customer, with a last-minute request for artwork help.
FULL STORY