May 2, 2016
If you have ever embroidered a six-panel cap, then you have most likely encountered difficulties in getting the embroidery to look as nice as it does on flats.
Whether you are a digitizer, shop owner or salesman, it is good to know the basics and limitations of embroidering on caps.
Center Out/Bottom Up
Digitizing for six-panel caps should be approached differently than embroidering on flats. Flats can be hooped with a circular hoop that surrounds the entire design, thus creating a stable environment. You do not have the same luxury with caps. Most cap hoops are comprised of a circular shell that goes inside and behind the face of the cap, which is stabilized by a small cable that clings around the base of the cap where the bill meets the hat. This only stabilizes the bottom of the cap leaving the rest of the cap to it’s own devices. For this particular reason you should digitize your designs from the bottom up. If you work from the top down, you are starting at the least stable part of the hat.
The other part that comes in to play is the seam in the center of the cap. If you go from one side to the other, the thread may push against that seam, especially in a fill-type situation, causing the fabric to pucker and make the stitching gap in that area. Unstructured hats are more likely to have problems with movement, but all six-panel caps need to be treated from the center out.
The general rule of thumb is a hat file will work on flats (as long as the fabric is similar), but a left-chest file will not work for hats. The reason we don’t just digitize this way for all designs is it takes much more planning and thinking to digitize for hats. It can also increase the stitch count. You may have to insert more color stops and trims to counteract the seam and the movement that you will get from hats.
Circles, Ovals and Egg-Shaped
One of the most common problems with embroidering on hats is distortion. Take the common circle, it can look great on flats, but appear egg-shaped or oval on hats. If you get an oval shaped image, this most likely is the result of lack of proper underlay. Sometimes, simply adding an edge-run underlay or increasing the pull compensation can often take care of the problem. If you are getting an egg shape from your circle, you have another problem — and it is not the digitizing.
If your circle design looks round when hooped on flats, but is either more narrow on the top or flat near the bottom this what we call egg-shaped. The shape of the hat is the cause of the warping. If you look at the profile of your hat you may see the face of the hat come away from the bill at a slope or that the top curves away from the face at a low height. Either of these factors can change the shape of the embroidery. There is not much you can do except shrink the design. If you cannot shrink the design enough to avoid warping, then your best solution is to change style of hats.
Outlines and Fills
Since most cap hoops only affect the base of the cap, there will be a chance of movement. The more area you travel, the higher the chance of movement. If you have a design that has several shapes that require Tatami (fill) stitch in one color and an outline in another, it may be to your advantage to break up the colorways. Instead of doing shape No. 1, shape No. 2 and shape No. 3 followed by the outlines, try shape No. 1/outline No. 1, shape No. 2/outline No. 2, etc. It will create more color stops, but increase your chances of matching up the fill to the outline.
Since you may not be able to use this technique on something like a large square or rectangle that has an outline, you may want to split up the outline itself. That way, you are limiting the amount of movement in the hat between the outline and it’s own underlay. Going around the entire design with a center run or edge run may give the hat enough chance to move between the outline and it’s underlay. Cutting the outline into four parts will reduce the time and area the needle needs to travel.
Sizing Information
Sizing for front of caps can be tricky, but the following offers some guidelines.
On hats that appear to have a short face or one that slants away from the bill, keep designs small. The maximum height should be 2 inches. The width may vary, between 3.5 inches and 4.5 inches. Your average hat will be able to take 2.25 inches in height and 4 inches in width, with some larger hats accepting up to 4.5 inches width and 2.5 inches in height. See figure above.
When the back strap is assembled, the hole in the back appears to be a smaller arch than it really is. To embroider, open up the back of the hat and hoop it with a circular hoop. This flattens the fabric, and when flat, the arch changes. A basic formula that works for many hats is 107 mm radius and maximum width of 3.25 inches for a 12 cm hoop and a maximum width of 4.25 inches for a size 15 cm hoop.
These dimensions are only a starting point. You may be able to go larger or have a need to go smaller, but these formulas should help eliminate a lot of guessing. There are so many hats out there all with slightly different architecture and the more you are aware how the structure can influence the design, the better off you will be.
Jesse Elliott is digitizing product manager for Artwork Source. For more information, visit artworksource.com.
July 28, 2023 | Design + Digitizing
Very few things in life stand the test of time. As natural as the ebb and flow of evolution, most seemingly universal customs are founded and practiced with vigor, only to fade away with a whisper as the years tick by.
FULL STORY
August 16, 2022 | Design + Digitizing
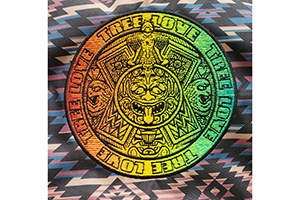
With this month’s On Design, we travel deep into the jungles of Central Mexico, harkening back to an ancient time where the Aztecs roamed the earth whilst building a formidable empire.
FULL STORY