March 15, 2016
Experienced embroiderers know when a design will result in a quality sewout, and their customers will be happy with the results. But embroidering on headwear presents a special set of challenges, which leads many embroiderers to avoid these projects.
The complexity of headwear production leads less-experienced embroiderers to subcontract such jobs to more experienced embroidery manufacturers. These veterans, in turn, can help them save time by switching a flat frame to a hat frame and adjust for art resolution, thus reducing damages and providing a high-quality product for their customers.
Embroidery is a representation of art and not an exact duplication of it. The biggest mistake you can avoid in headwear embroidery production is accepting a project that presents clarity issues in the design and letters. Prior to taking an order, discuss the adjustments that need to be made for quality results.
There are some important overall guidelines to observe when embroidering on hats:
1. Minimum letter size should be 1⁄5-inch tall.
2. Most customers are not satisfied with the look of lettering done with a running stitch.
3. Lettering with serif fonts and some thin sans serif fonts need to be increased so their lines are thick enough.
4. The type of hat dictates the embroidery size.
5. Some small elements, such as lettering or thin lines, need to be removed or enlarged.
6. A logo that may work on a baseball cap may need to be modified to work on a visor or bucket hat.
7. Hoop burn is an issue common to all hat styles, so spray water on the location and lightly brush the fabric.
Following are some common issues for each headwear style and their solutions, which will help you avoid costly mistakes, better service your existing embroidery clients and increase your revenue per client.
Beanies/Toques
This headwear type enables em-broidery on all four sides. However, common elements like stripes or other designs may interfere.
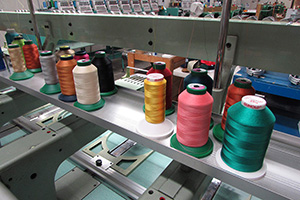
Solution: Find a location that works for the size of the design. Beanies and toques often are made of fleece or knitted fabrics, so pay attention to small elements that could disappear in the soft fabric. There must be sufficient underlay to ensure the top stitching has a stable surface to stitch into.
One option is to use a solid fill stitch so you can embroider over the stitches, giving you a surface that will not bury.
As a last resort, Solvy is a water-soluble embroidery topping best used on knits, terry cloth, fleece and other textured fabrics to create a smooth surface. However, it should only be used as a last resort.
Bucket Hats
Embroidery size varies by bucket hat style. Some can fit the full 2½-inch-tall height and others allow less than an inch due to the hat’s construction. Most bucket styles have a fabric band around the bottom of the crown restricting the available design space, as you can not embroider over the band.
Bucket hats also commonly have air holes, eyelets and snaps on the side that get in the way of embroidery. During production, bucket hats with larger brims can get grease on them from the embroidery machine.
Solution: Given the space restrictions for this type of hat, it may be best to strictly stick to the front or back for design placement. Also, keeping your machine clean is the best line of defense against grease stains. Always wipe the machine clean after oiling it. Although time consuming, this is a necessary step, especially when working with white or light-colored products.
Flat-Bill Caps (Snapbacks)
You can embroider a standard 2½” x 6″ design in the center front of a flat-bill cap. The biggest issue with these caps occurs during production when the bills are bent.
Solution: There are no preventative measures for this problem other than being careful. Have your trimmers straighten the cap bills. Although time consuming, it’s the best remedy.
Visors
Visors have more limited space for embroidery — usually about 1¼ inches tall — and the ideal location is in the front center where they are the tallest.
The maximum design width generally is 4-4½ inches. The sides of most visors will only allow embroidery less than 1 inch tall and the back can’t be embroidered at all.
The crown height and curve of a visor should be taken into account when sizing the design. For example, a visor with a crown height of 2¼ inches tall would best fit a logo 1¼ inches tall. This would leave ½-inch at the bottom and ½-inch at the top.
Solution: In your production process, allow for time to modify the customer’s design so that you know you can produce a quality result and satisfy the customer. Prior to taking the job, have your art department work with your customer to adjust the design. There is no point in taking an order that can’t be produced properly.
Small lettering or detailed designs simply may not work well on visors due to the small embroidery area. If the design won’t work, try to find another hat that will work or walk away from the order. It’s not worth the risk of producing a less-than-quality result.
Five-, Six-Panel Caps
You can embroider on all four sides of these hats. Many five-panel caps have mesh on the sides and a tearaway backing is recommended when embroidering on mesh for best results. They also have a foam-front panel that creates an issue with embroidery burying into the foam.
Screen printing is a great alternative, but some clients prefer embroidery.
Solution: Always use a thin font and no fine details in the design. Six-panel caps have a seam running down the center. You can embroider right over it as you commonly do with no loss of quality.
Additionally, designs on a five-panel cap may be sewn slightly off-center without being readily visible. On six-panel hats, where there is a center seam, designs even slightly off-center may be visually disturbing. Some designs that are weighted to one side or the other must be placed where they are graphically pleasing.
Examples include italic fonts or images where there is a small element protruding off to the side of the main part of the logo. The letter “M” with a feather hanging off the side of the letter would cause a problem.
When centering on the entire design, including the feather, the center line of the M would not line up on the center seam of the cap. In these rare cases, center points must be adjusted off-center to give the appearance that the design is centered.
Structured/Unstructured Hats
There are two general categories of baseball caps: structured and unstructured. The structured cap has a stiffer supportive fabric called buckram inside the front two panels that helps the cap to hold its shape or “spring back” if folded or crumpled. An unstructured cap means there are no support panels in the front two panels. Unstructured and structured caps have a maximum embroidery space in the front of 2½” x 6″.
Brian Burr is chief operating officer of wholesalehats.com, Palm Desert, Calif., which has produced embroidered garments for clientele that includes Google, NASA and the United States Army. He has been involved in every aspect of the embroidery industry for more than 20 years, including machine operation and repair. For more information or to comment on this article, email Brian at brian@wholesalehats.com.
July 28, 2023 | Design + Digitizing
Very few things in life stand the test of time. As natural as the ebb and flow of evolution, most seemingly universal customs are founded and practiced with vigor, only to fade away with a whisper as the years tick by.
FULL STORY
August 16, 2022 | Design + Digitizing
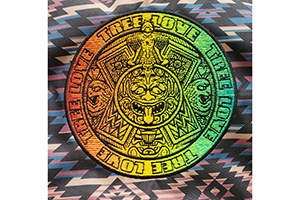
With this month’s On Design, we travel deep into the jungles of Central Mexico, harkening back to an ancient time where the Aztecs roamed the earth whilst building a formidable empire.
FULL STORY