June 10, 2014
A node is a designer’s best friend in many programs. Many embroidery software programs also use nodes to create and define aspects of a shape.
The most simplistic definition of a node is that it is a connection point. A group of nodes make a shape. This article will discuss the use of nodes, the most common types of node attributes and best use strategies for nodes. In addition to embroidery software, the discussion of nodes will transfer over to popular graphics programs such as Adobe Illustrator and CorelDRAW.
During the digitizing or graphic-creation process, every time you click the mouse, you are placing a node. One of the most common frustrations when drawing a shape is to get the handle to travel in the correct direction. Quite often, a new user will spend most of his time trying to determine which direction to drag the handle line, rather than creating the shape itself.
As far as embroidery is concerned, having fewer nodes is better than having too many nodes. The primary benefit is that fewer nodes equal less to adjust when editing. This is a huge time saver when it comes to reshaping an object or making slight adjustments. If an object has too many nodes, then each node must adjust in order to make adjustments to a shape. Another benefit of fewer nodes is that they create smoother shapes. A longer and softer transition within a shape is far better than short, choppy movements. The shape will be much more graceful. Additionally, fewer nodes results in fewer clicks of the mouse, which means that not only can you create shapes at a faster pace, but you also will have less wear and tear on your clicking finger.
Many programs allow a method for creating multiple node types while creating the actual shape, which eliminates the requirement of going back to the object to edit the node type. For example, a common method of entry point manipulation would be to left-click for straight points and right-click for curved points.
Perhaps the most common type of input type is the Bezier curve. With this type of input, the user left-clicks for a straight point and left-clicks-and-drags for the curved point. This allows the user to work in a very fast motion without having to stop and change node types along the way. The Bezier curve often emulates the smooth node type. A Bezier curve was publicized by the French engineer Pierre Bezier, who used it to design automobile bodies, but did not create the concept.
When creating a shape, it is common to use a variety of node types. However, inexperienced users tend to create an abundance of a single node type rather than using fewer nodes and altering the type. Let’s discuss these node types and how they can be used.
Node Types
Node types generally are related to the way other nodes appear before or after a shape.
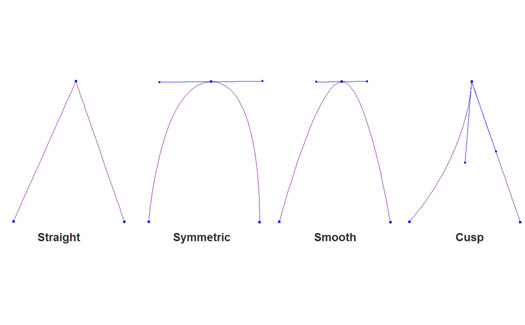
Straight — A straight node has a straight line before and after the individual node. If a user was to only use straight nodes, it would take many more of those nodes to create the shape. Additionally, the shape would be choppy, as there is no smooth way to make curves with a straight node. A straight node is the easiest type to create, as it is nothing more than a simple click. The typical use for a straight node would be to turn corners. Many software programs enable you to create a straight line by pressing and holding the Shift key.
Cusp — A cusp node allows each side of a node to retain individual characteristics. Changes to one side of a node have no bearing or effect on the other side of the node. For example, setting the node type to cusp allows the user to place a small curve to the left of the node and a larger curve to the right of the node. The sides of each node have control arms or handles, which can be dragged to different positions. As the handle is dragged, the shape of the line associated with the handle changes, too.
Symmetrical — This node type constrains the angle of the direction lines to 180° so the direction lines have the same length on each side of the anchor point. The same curvature is created on both sides of the anchor point. The handle always will be the same size on each side of the anchor point. As the name implies, regardless of what is done to the handle on either side of the node, the other side will adjust in a symmetrical manner.
Smooth — A smooth node causes the shape of each side of the node to transition smoothly from one line to the next. The angle of the direction lines are constrained to 180° and allows the user to vary the length of the direction line on one side of the anchor point. The smooth node can be a bit tricky, as it has a similar feel to a symmetrical line.
It is much easier to learn to work with nodes by starting out with as few as possible. Using more nodes gives a false sense of security and will actually create more headaches in the long run. While it will seem quite awkward at first, using fewer nodes will translate into cleaner objects with a shorter learning curve.
Ed Levy is director of software products at Hirsch Intl., and owner of Digitize4u, an embroidery, digitizing and consulting firm in Montoursville, Pa. For more information or to comment on this article, email Ed at ed@hic.us.
July 28, 2023 | Design + Digitizing
Very few things in life stand the test of time. As natural as the ebb and flow of evolution, most seemingly universal customs are founded and practiced with vigor, only to fade away with a whisper as the years tick by.
FULL STORY
August 16, 2022 | Design + Digitizing
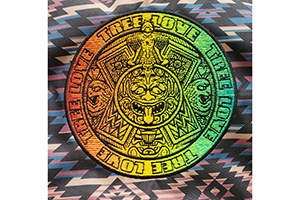
With this month’s On Design, we travel deep into the jungles of Central Mexico, harkening back to an ancient time where the Aztecs roamed the earth whilst building a formidable empire.
FULL STORY